


Master the Craft: A Complete Guide to Rug Tufting for Beginners in 2026
Have you ever walked across a plush, vibrant rug and thought, “I wish I could make that exactly how I want it”? Well, in 2026, the world of textile art has never been more accessible, and rug tufting for beginners has transformed from a niche hobby into a global creative movement. Whether you want to create a custom piece for your living room or launch a small handmade business, tufting offers a tactile, satisfying way to turn your digital doodles into cozy floor art.
I remember my first attempt at tufting. I was so nervous about the “gun” aspect of it that I held the machine like it was a power tool from a sci-fi movie. But within twenty minutes, the rhythmic thump-thump-thump of the needle became meditative. By the end of the afternoon, I had a fuzzy (albeit slightly lopsided) smiley face rug. This guide is designed to help you skip the “lopsided” phase and get straight to the “masterpiece” phase.
Key Takeaways
- Start with the Right Tools: A cut-pile tufting gun is generally the most beginner-friendly option for achieving that classic “shag” look.
- Fabric Tension is Everything: Your backing fabric must be “drum-tight” on your frame to prevent the needle from snagging.
- Yarn Selection Matters: 100% Acrylic is budget-friendly for practice, but wool blends offer the best durability for high-traffic rugs.
- Safety First: Always wear eye protection and a mask to avoid inhaling yarn fibers and glue fumes.
1. What Is Rug Tufting?
Rug tufting is a modern take on the traditional art of rug hooking. Instead of pulling loops through a canvas by hand, we use a tufting gun—a handheld machine that shoots yarn through a primary backing fabric at high speeds.
In 2026, tufting has evolved. We aren’t just making floor mats; we’re making wall hangings, textured pillows, and even 3D wearable art. It’s essentially “painting with yarn.” The gun does the heavy lifting, allowing you to fill large areas with color and texture much faster than traditional knitting or weaving.
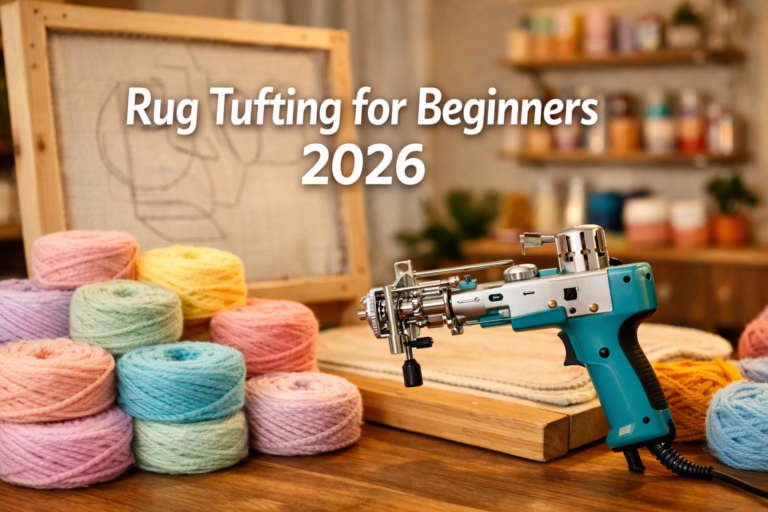
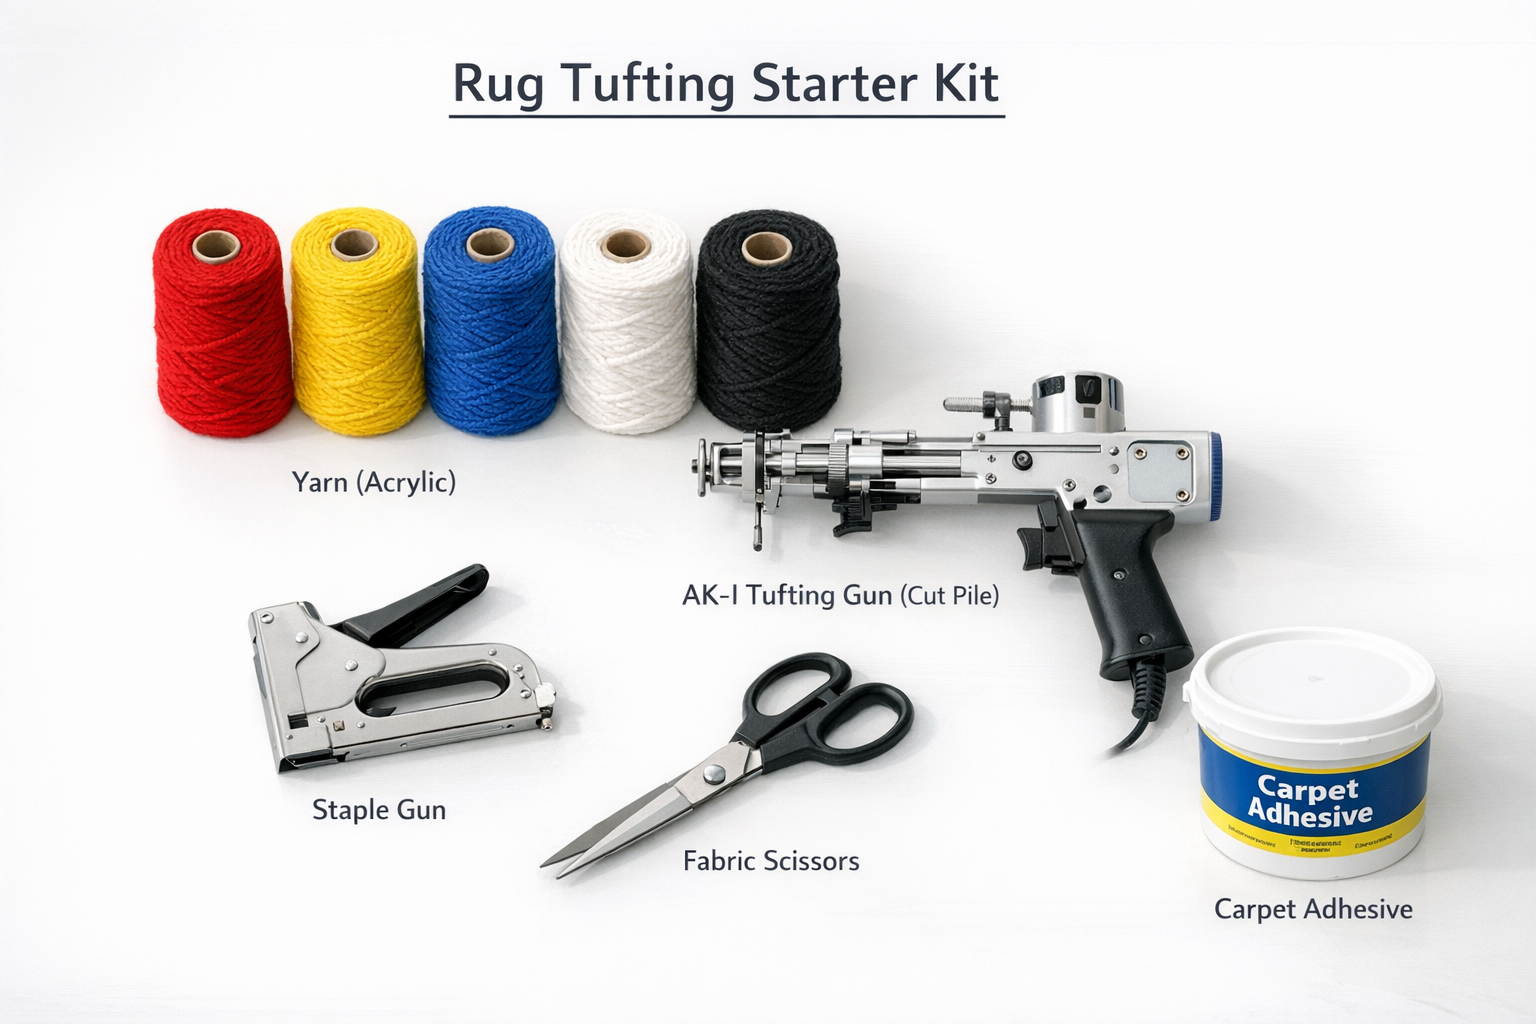
2. Tools and Materials You Need
Before you pull the trigger, you need to gather your arsenal. Rug tufting for beginners starts with a solid foundation of quality materials.
| Tool/Material | Purpose | Estimated Cost (USD) |
|---|---|---|
| Tufting Gun | The machine that pushes yarn through fabric. | $150 – $250 |
| Tufting Frame | Holds your fabric tight (usually wooden). | $40 (DIY) – $100 |
| Monk’s Cloth | The primary backing fabric (must have lines). | $15 – $30 per yard |
| Yarn | The “paint” for your rug. | $5 – $15 per skein |
| Carpet Glue | Seals the yarn in place. | $20 – $40 |
| Secondary Backing | The final layer (felt or non-slip fabric). | $10 – $20 |
Pro Tip: Don’t skimp on the frame. If your frame wobbles, your lines won’t be straight!
3. Setting Up a Tufting Frame
You cannot tuft on a loose piece of cloth. You need a sturdy wooden frame equipped with carpet tack strips.
- Build or Buy: Most beginners start with a 30″ x 30″ frame.
- Stretch the Fabric: Place your Monk’s cloth over the tack strips. Pull from the center of each side, moving outward.
- The “Drum” Test: Flick the fabric with your finger. It should sound like a drum. If it sags, your gun will get stuck, and you’ll likely tear a hole in your expensive fabric.
4. Choosing Yarn and Backing Fabric
In my experience, the biggest mistake in rug tufting for beginners is picking the wrong yarn.
- Acrylic Yarn: Great for beginners! It’s cheap, comes in every color imaginable, and is very soft. However, it pills easily.
- Wool Yarn: The gold standard. It’s flame-retardant, resists dirt, and lasts for decades. If you’re selling your rugs in 2026, use wool.
- Backing Fabric: Always look for Primary Tufting Cloth (Monk’s Cloth) with yellow or white guidelines. These lines help you keep your design straight and ensure your tension is even across the frame.
5. Transferring Your Design
Unless you’re a freestyle pro, you’ll want a guide.
- The Projector Method: This is the 2026 standard. Hook your laptop or phone up to a small pico projector and shine your image directly onto the taut fabric.
- Tracing: Use a permanent marker to trace the outlines.
- Crucial Step: Remember to mirror your design! You tuft from the back of the rug, so if you’re tufting letters, they need to be drawn backward on the fabric so they appear correctly on the front.
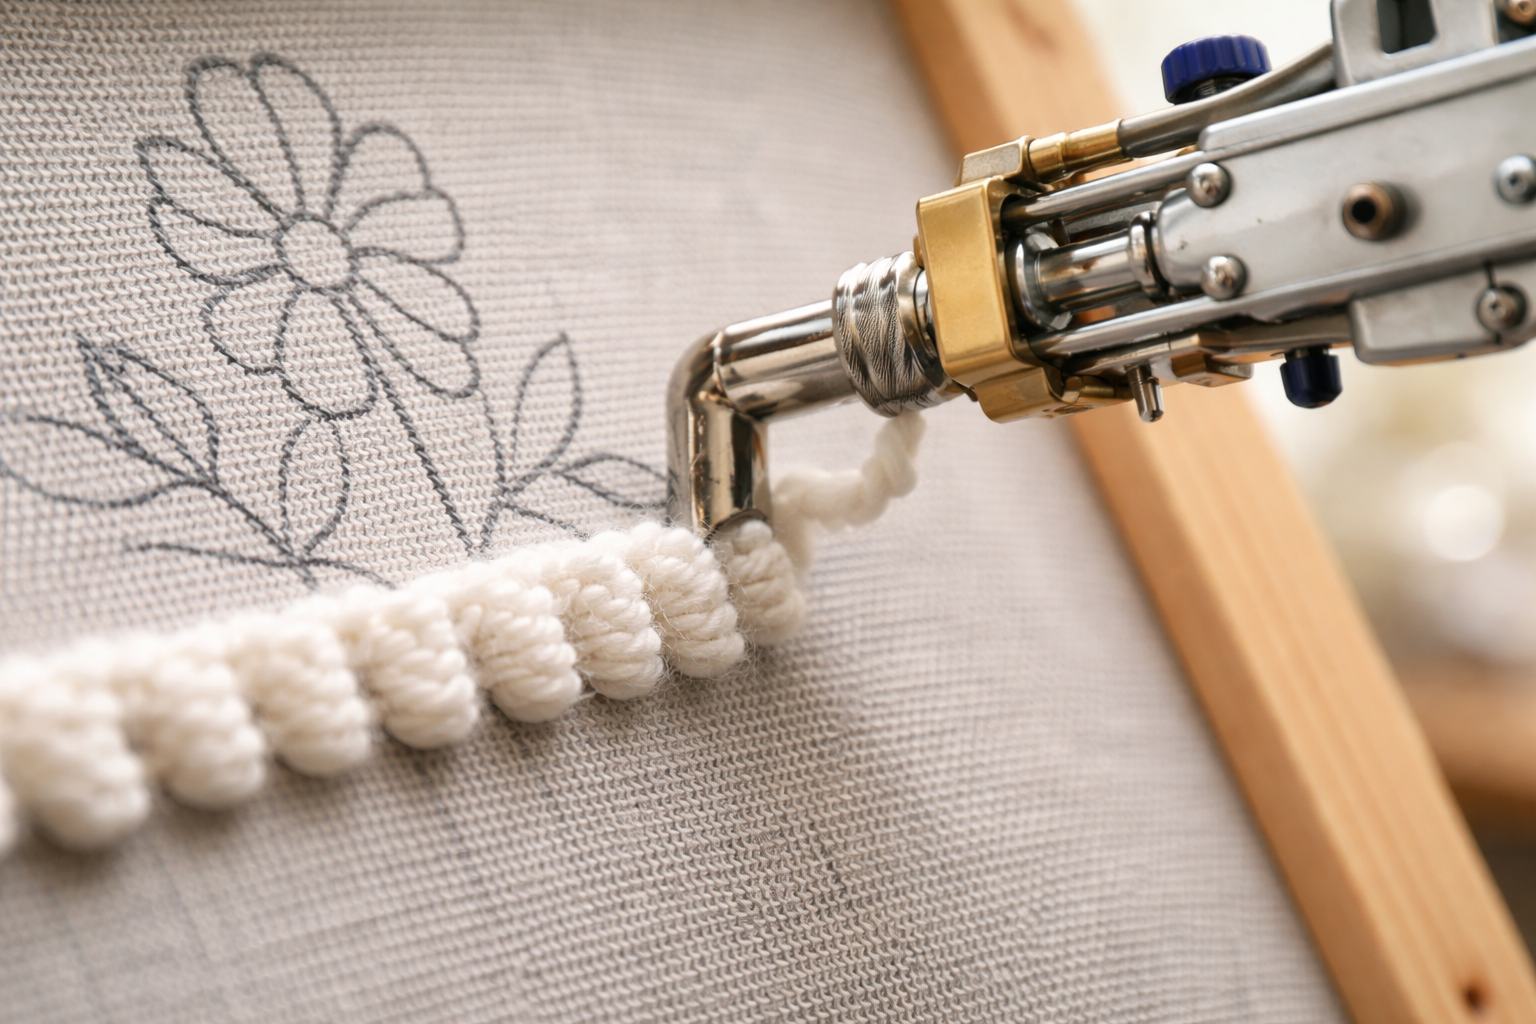
6. How to Use a Tufting Gun
Holding a tufting gun for the first time feels powerful. Here is the basic technique for rug tufting for beginners:
- Thread the Gun: Use a yarn threader to pull two strands of yarn through the needle eye. (Most guns work best with double strands).
- Insert the Needle: Push the needle head all the way through the fabric until the foot of the gun is pressed firmly against the cloth.
- Apply Pressure: This is the secret. You must apply consistent forward pressure against the frame. If the gun bounces off the fabric, it will cut the cloth.
- Move Upward: Most guns are designed to move in an upward or horizontal direction. Never tuft “down” or backward unless you’ve mastered advanced techniques.
7. Cut Pile vs Loop Pile
When you buy a gun, you have to choose your “vibe.”
- Cut Pile (AK-I style): This is the most popular. The gun has a tiny pair of scissors that snips the yarn as it tufts, creating a shaggy, fluffy finish.
- Loop Pile (AK-II style): This creates a continuous loop of yarn, resulting in a finish that looks more like a traditional Persian rug or a commercial carpet. It’s harder to “trim” later but very durable.
8. Gluing and Backing the Rug
Once you finish your masterpiece, it’s currently just yarn held in by friction. If you pull a thread, the whole thing will unravel!
- Apply Latex Glue: While the rug is still on the frame, spread a generous layer of carpet adhesive (like Roberts 3095 or a flexible latex glue) over the back.
- Let it Dry: Wait 24 hours. Don’t rush this!
- Attach Secondary Backing: Once dry, use a spray adhesive or more carpet glue to attach a layer of felt or non-slip backing. This hides the “ugly” side and makes the rug professional.
9. Trimming and Carving for a Clean Finish
This is where the magic happens. A “raw” tufted rug looks a bit messy. To get that high-end look:
- Sheep Shears: Use professional rug carvers or sheep shears to level the top of the pile so it’s perfectly flat.
- Detailing: Use small scissors to “carve” channels between different colors. This creates 3D separation and makes your design pop.
10. Safety Tips
Tufting is fun, but the machines move fast.
- Eye Protection: A stray piece of yarn or a broken needle can fly toward your face.
- Hair Up: If you have long hair, tie it back. The gears on a tufting gun are exposed and will snag hair in a heartbeat.
- Mask Up: Cutting and trimming yarn creates “yarn dust.” Protect your lungs!
11. Common Beginner Mistakes
- Not enough pressure: If you don’t push hard against the frame, the gun will “walk” away from you and create holes.
- Going too fast: Let the machine set the pace. Don’t try to race the motor.
- Wrong fabric: Don’t use burlap or loosely woven linen. They will disintegrate under the speed of a 2026-era tufting gun.
12. Cost Breakdown for Starting Rug Tufting
Starting this hobby requires an upfront investment. Here is what you can expect to spend in 2026:
- Starter Bundle (Gun + Cloth + Basic Frame): $280 – $350.
- Consumables (Yarn + Glue per rug): $30 – $60 depending on size.
- Total Initial Investment: Approximately $400 to get your first professional-grade rug finished.
13. How Long It Takes to Make a Rug
For a standard 2′ x 2′ rug:
- Setup/Design: 1 hour.
- Tufting: 3 – 5 hours.
- Gluing/Drying: 24 hours (passive).
- Backing and Trimming: 2 hours.
- Total Active Time: 6 – 8 hours.
14. Final Tips for First Projects
Don’t start with a portrait of your dog! Your first project should be something with simple shapes and bold colors—think 90s geometric patterns or a simple floral. Practice your straight lines and curves on the edges of your fabric before moving into your main design.
Conclusion: Your Tufting Journey Starts Now
Rug tufting is one of the most rewarding DIY crafts available in 2026. It combines digital design, physical movement, and the ultimate cozy payoff. Now that you know the basics of rug tufting for beginners, the only thing left to do is build your frame and start your first line. Remember: keep your fabric tight, your pressure firm, and your creativity wild.
Next Steps:
- Order a cut-pile starter kit.
- Build a simple 30″ wooden frame.
- Start with a 3-color geometric design.
Happy tufting!
References
- The Modern Weaver’s Handbook (2024). New York: Textile Press.
- DIY Rug Making: From Hooking to Tufting (2023). London: Creative Arts Publishing.
- Safety Standards for Handheld Power Tools in Fiber Arts (2025). International Craft Safety Board.
SEO Meta Data
- Meta Title: Rug Tufting for Beginners: The Ultimate 2026 Guide
- Meta Description: Learn rug tufting for beginners with our 2026 guide. Master tufting guns, choosing yarn, and finishing techniques to create stunning DIY handmade rugs.


